I have been thinking about a horse's posture and how that can have an effect on their feet and vice versa.
If I meet a new client horse (or sometimes when I am revisiting for a maintenance trim) I like to have a look at the horse from afar, take in his general posture and demeanor. Of course, it all depends on how the horse is stood up, but if you watch for a while the horse will return to it's default stance. Better yet, watch the horse in turnout. Watch for trends, which hoof they favour for striking off first, which hind limb they rest more, if they graze with one leg consistently forward.
Shall we look at a few pictures? I am commenting on these pictures as if I had observed this to be the horse's default stance.
A horse with good overall posture. Relaxed top line, neck hanging like a pendulum. Front legs straight (not out in front or underneath). This horse does have a weak stifle and straight hocks, which would lead me to investigate the back end for soreness.
Same horse stood up with poor posture - front legs camped under (maybe getting pressure off the heels - caudal heel pain?). Shoulder and neck tight, tense. Back looks tight, loins look hard and as if they are holding up the horse's hind end. Hind feet camped under, taking pressure off toes?
Allie, looking at me while out grazing. Good overall posture, loins look a little long and weak - keep those hind toes short to avoid soreness in the loin! Left front leg is not weight bearing - compensating for something in the hoof? Or possibly soreness in the shoulder? Horse is tucked up, with sunken flanks and if I didn't know her I would look for a reason for it. BUT this is normal for her. She got it from her sire.
Horse camped WAY under with all four legs. Long toes in front, but he is getting weight off his heels - caudal heel pain? Horse most likely would NOT stride heel first. Shoulder looks tense, but the back does not - it looks fairly relaxed. Where the tension starts again is from the point of the croup back to the top of the dock - you can even see his tense muscles around his hip and flank area. He can't possibly be balanced in the hind end standing like that - partially conformational with his sickle hocks and short pasterns, but it would be very interesting to see what the bottom of his feet looked like!.
This is an extreme case of standing under with the fronts - if you were
to drop a line from the fulcrum of his shoulder blade, it would not even
contact any part of his limb except maybe the very top muscle, even with his super long toes! Extreme separation, I predict thee.
Gracie out grazing - a less obvious stance but similar to the chestnut above - standing under all but the left front leg. Back and shoulders fairly relaxed, but she has a longish loin - needs hind toes to be kept short. Nice strong short croup though may help give the weaker loin some stability. Right fore leg not weight bearing - probably because she is about to take a step but could also indicate a weakness there. Hind legs standing very awkwardly (see below!).
Ummm... yeah. Mass symmetry issues - I would look for imbalances in the hoof especially the inside left and outside right heels. LUCKY this is not her normal stance!! Looks like the hocks are both pointing to something to the right of the photo.
Again with the hind end tension and weaknesses - long loin, tight croup and weak stifles. He even has what looks to be deteriorated muscles over the hindquarter. Slightly sickle hocked - Keep hinds short to help with heel first landings (not normally a problem in hind hooves!).
This guy looks pretty good in the hind end posture wise (except for how wide apart his legs are) but what strikes me first about him is his foreleg stance - he looks like he is rocking back on his heels. Laminitic or separation issues are a possibility. His shoulders, neck and entire topline from wither to tail look nice and relaxed though.
Get up on a stool and look at the horse's back from this angle - you will be able to see if the muscling is symmetrical, if the spine is straight, if the hips are also symmetrical. This is Allie, and she is fairly symmetrical, with a lovely straight spine.
This is what you are looking at!
I recently went to see a pony to talk to her owner about how her
trimming was going. After looking at her feet we stood there chatting
and I found myself looking at the pony as a whole. The biggest thing I
noticed was her spine alignment - being a pony, this was easy to see.
Her spine bulged out to the left quite noticeably. A second look at her
feet showed that the cause was possibly a much higher inside heel on her
right front hoof. Her shoulder was also very tight and it was almost impossible to get even a finger under the scapula.
Now I have not undergone much training to do with equine conformation, posture or anything of that sort except my own research, an unfinished equine management diploma and my own findings in horses I have worked with. Above are the few things I feel confident noting but I think the most important thing is to listen to the WHOLE horse - not just his feet. Often, what is happening in the feet is just a mirror or echo of what is happening 'upstairs'.
I would love to start a discussion in the comments!
Brett is an older (over 20) OTTB gelding. His owner turned to me for trimming because her old farrier was unable to trim the hind feet close to the ground as he is an older man. Poor Brett has arthritis in his hind pasterns and is very very sore if the joint is hyperflexed. His feet are also very flat and have a lot of flare.
His last farrier would only trim him every 8 weeks or so, as he would go foot sore after every trim. He suggested leaving longer walls on for comfort. I started him off on a two week trim cycle until I could get his wall length and heel height were I wanted it, and now he is on a 4 week trim cycle. I didn't want to make any drastic changes right away with this horse because he is so sore, all over. He has been dragging himself along for so long that his entire body moved incorrectly.
We took a short video of Brett prior to my trim. His owner seems to be dragging him along, and then at the end he just stops. His shoulders are tight and tense, he is holding himself together with his back and shoulders. Just a sore horse all over, poor thing.
I only got photos of the left front, but all his feet look the same.
Same as the first photo, but with some lines. Blue line shows where the hoof wall should be. Red line shows how I have relieved the quarters a little (note the bulge in the coronary band is not so pronounced after).
This one shows heels and wall height. Brought heels almost to the frog.
Side view shows the bevel - more outer hoof wall to take but I wanted to change things slowly for this horse.
These shots probably show how little I actually did during this first trim. It also shows how much separation this poor horse has, in the super stretched laminae line, even in the after shot.
With lines showing hoof balance - His hoof is actually well balanced. Frog is 3 quarters of the hoof, toe isn't too long. Brett's main hoof problem is just the separation. So easy to fix!! Shorter trim cycles.
Video of Brett after trim - owner doesn't have to drag him - the walk is more free and he looks a bit more relaxed.
Brett is already almost 3 months into his hoof rehab. He has his good and bad days, due to his arthritis and body issues. But there is definitely improvement. Next trim is in just under a month. I will get some updated pictures then. Wish us luck!
"Understand that all this talk of heel first landings is about the natural alignment of the bones during locomotion; NOT the outer heel we see. If a horse's heels are artificially raised and they (heels) happen to hit the ground first, P3 may STILL be toe first on impact and causing the same unnatural forces" - Pete Ramey
The higher the heel the harder it would be for the horse to land any other way than toe first.
The above quote is a bit of an "ah ha!" moment for me. It is pretty obvious that we are all aiming for heel first landings, but leaving too much height in the heels so they are comfortable to land first may be counter-productive. But then if they have weak heels they need a little extra height for comfort and to encourage proper movement. Oy!
HOWEVER I still lower tall heels, but slowly. At a set-up trim, I will take the heels down much less than I think they need to be if the horse has weak digital cushion, frog & lateral cartilages - but I bring the heels back as far as I can. The second trim I will schedule for 1 or 2 weeks (depending on how bad the foot is) after the set up trim, and if I can't get the heels down to where I want them at that time (according to the horse's soundness) then I will come out again in 1 or 2 weeks. If it were my own horse, I would trim them down a millimeter or two every couple of days over the course of a few weeks.
I found it hard at first to see a heel first landing. When a horse is moving slow enough to see it, it is generally at grazing pace and the horse will not land heel first then anyway! The horse has to be marching along in a fast walk or trot. What I find works is not watching the foot - I watch the horse's knee. If it is straight before the hoof hits the ground, then that is a heel first landing. If you aren't sure if it is straight or if it is borderline, then the horse is landing flat. A knee that straightens after the hoof is on the ground is the toe first landing we want to avoid. If the horse is walking in loose dirt or on an arena surface, a toe first landing will produce a little puff of dust out the front of the toe.
Practice on YouTube watching horse videos to develop your eye, that is what I did! There are heaps of slow motion videos on YouTube, like the one above.
Heel first landings are important because, well, everything. Everything will fall into place if the hoof lands heel first, and everything will fall apart when there is a toe first landing. The heels have specialised structures to take the force of the horse's stride - digital cushion, lateral cartilages, the frog and the function of p3 where it becomes ground parallel when loaded. All these structures work correctly when they land first. They develop and become stronger when used.
How to trim for a heel first landing? You need to be able to recognise that individual horse's optimum heel height, address thrush infections, ensure the bars are not too tall, bring the heels back as far as possible. Easy, huh? :P
Gracie heels before (left) and after trim. Note that the heels are slightly longer due to soft ground at the time. (Heels sink in and frog still gets pressure)
Allie before and after trim. Frog a little thrushy, she wan;t landing heel first properly and the frog started to suffer because of it.
Gracie right front heels. Note the right heel has an old scar that grows down and affect the heel structure.
Bertha - this horse is comfy on her heels and was at 6 weeks at this trim - heels grew long and came forward and uneven. Shorter trim cycle would help prevent this.
Bertha heels pre-trim. Frog passive, too much so. Frog starting to get ratty and flaky, not being exfoliated. Perfect environment for thrush which would just make the back of the foot even less able to take proper heel height.
I know I keep posting this photo, but it is such a good example of poor contracted heels. (Archie)
Same hoof as above, heel view, post trim. Lands heel first in boots or barefoot on soft ground.
Archie left hind pre-trim. This leg is recovering from an injury. Unusual for hinds to be so contracted too.
Remy - another contracted hoof, deep central sulcus. Sky-high heels. These are obviously two different feet - his two fronts I think. The pic on the fight is his clubby foot.
Poor Archie again. Note I have taken the heels down to the level of the frog - this frog needs the stimulation more than the protection, otherwise we will never get out of the contracted-foot circle.
Archie set-up trim. Those bars were huge and had thrush all underneath them. They needed to come out and I had confirmation of it as they didn't pop up as severely again.
Hi Lisa - there is some debate about hay soaking - I think it is important to understand the whys rather than stick to a formula. So..... As you know you need a large volume of water for effective removal of water soluable carb (sugar) - otherwise the water will become saturated with sugar and the process will stop. Yeast will ferment the sugars in the water producing 'hay beer'. This can smell sour. So soaked hay should be well rinsed with more clean water before feeding to remove the beer. Even in hot conditions, with my hay type I soak for 12-24 hours and then rinse. For Grace (my horse) anything less than 12 is risky. Our hay is a rye/timothy mix with the emphasis on the rye, so is extremely unhelpful. Some 'new' hays and those with a lot of 'weed' content don't stand up to soaking so well and go slimey. If I came across a hay like that I would probably avoid using at all. A slimey when soaked weed is not necessarily a low sugar weed, for example plaintain is high sugar as is yarrow. They don't soak well. Note some folks say an hour is enough because it can remove upto 30% of WSC. That is too vague and misleading unless you know what you are removing 30% of and it is 'upto' not 'guaranteed'. Anecdotal evidence suggests for the very sensitive 12 is a good place. It took me weeks and weeks to train Grace to eat soaked hay - we started with 20 minutes and worked up. Now she prefers it and gets terribly excited by the arrival of her wet hay. Even long term sugar addicts can be retrained (except me.....)
Sometimes you will notice I mention the 'quarter scoop'. This is the scoop you should be trimming into the hoof if it needs it, following the scoop of the live sole (i.e. the scoop of the pedal bone).
The hoof will tell you if it needs a scoop done. If the coronary band has a bulge or is not a straight line (very hard to see on hairy legs!). Also a scoop can be useful to relieve flaring in the quarters.
Very slight quarter scoop.
Scoop to help relieve quarter flare and the coronary band. (Beckham, 2006ish? One of my very old trims)
This horse had foundered. Not the bruising in the toe. Noticeable scooping. (not one of mine, just a googled image)
One of the most famous photos of a feral horse cadaver. It is dried out, but you can see the natural scoop and how it follows the live sole plane.
(Blogger is being a bitch right now and won't let me caption pictures anymore, it keeps deleting the pic!! GRR. So captions under the photos now. Sorry!)
Quite a severe quarter scoop shown here.
Note the coronary bulge (mostly due to this weird shoe set-up I suspect).
I would use a quarter scoop here to relieve coronary bulge and quarter cracks. (Among other things. Poor hoof!)
I know how much scoop to trim in by following the live sole. When trimming a hoof that doesn't need the quarter scoop you would end up cutting below the level of the live sole. If you tried to turn your rasp to trim the scoop you would find it very hard to trim it in if the hoof doesn't need it!!
Apparently quarter scoops are a little controversial in the online barefoot world (what isn't!!) but I have always scooped the quarters if the hoof tells me it needs it.
Who on earth looked at the bottom of a horse's hoof and thought "I will call that part... THE FROG!".
Anyway.
A near perfect frog, from a hind hoof.
The frog's function is to be an essential part of the landing gear at the back of the foot. It acts as a shock absorber along with the digital cushion. Also, when the hoof hits the ground, the frog compresses and squeezes blood back out of the foot and up the limb again.*Edit 29.10.11: there is some research that suggests that when the hoof is loaded, the dropped frog and sole actually create a vacuum ad suck blood into the hoof, rather than pushing it out! Must investigate this further... Ok, carry on!* I like to say that a horse has five hearts - one in his chest and one on the underside of each of his feet. :)
Correct movement = heel first landings = the force of the hoof hitting the ground being dissipated throughout the structures designed to do just that, limiting concussion.
The frog should look plump, open, flat and healthy. It should be wide at the heels. The central sulcus should look like someone has pressed their thumb into pliable putty, not look like a deep crevice. It should be free of thrush, and have passive contact with the ground in the stationary hoof. On soft ground (where the hoof would sink into the ground when loaded) the frog should be further away from the ground than on hard ground, where the frog is normally at heel height
The frog should take up 2/3 of the hoof
The frog should barely be trimmed at all. The only trimming a frog would need in most circumstances is to open up any areas that thrush would be hiding under.
Here is a trim I did on Gracie. Compare the frog before (left) to after I finished the trim. All I have removed is anything that was harboring thrush but did not remove anything she would need. (Ignore the terribly uneven heels - this was fixed after photo was taken!)
I found this on the internet - the whole frog needing to come off as there was a severe thrush infection under there. Thrush is painful! This horse would need boots and frog stimulating pads (depending on how comfy he was in them) on 24/7 til the frog calloused and came back to life I would imagine.
The frog should NEVER be trimmed like this, no matter how pretty that looks!
If the frog is compromised in any way (thrush and over trimming being the most common), this leads to flat or toe first landings. If the hoof is trimmed (or shod) in such a way that the frog is taken out of it's secondary weight bearing duties, then the hoof will contract up, the central sulcus will form a deep crack and provide a nice comfy house for thrush to thrive, and the frog will no longer be fully functional (if at all depending on the amount of contraction).
Frog has become too passive due to thrush infection (looks like it is clearing up though)
Severely contracted hoof and frog.
Top is a fairly normal hoof with frog having passive ground contact. Bottom is a contracted hoof with the frog suspended out of contact with the ground unless the ground was very soft.
So consider the frog when trimming - leave it alone unless there is thrush present, then take the bare minimum you can. Keep it clean, and in passive contact with the ground. Most of all, trim for heel first landings! If a horse is landing heel first, the frog will pretty much look after itself.
Here is Australia it is cheap and easy to keep horses living outside in yards and/or paddocks 24/7. Most of the country has relatively mild winters (only small pockets of the country actually get snow) and a few good waterproof rugs is generally all you need for winter.
So, I have not been exposed to the delights and pitfalls of the stabled horse. There is a lot about managing the stabled horse that I have no clue about or have never heard of. One of those things is Equine Canker.
I was googling for some pictures of frogs for an upcoming post and came across this canker business. I thought canker was just an old English word for cancer. And apparently that is sort of what it is - hoof cancer. The pictures I saw were grotesque. I'll post a few at the end of this post.
Here is a link to an Aussie PDF info page about canker:
http://www.barehoofcare.com/fact%20sheets/equine_canker.pdf
The short of it is that canker is an eventual result of infected feetsies standing around in excrement for too long. It is an over growth of hoof tissues and apparently smells pretty disgusting due to the overactive cells getting infected with all sorts of vile and disgusting microbes. Yummo.
It is treatable but is degenerative and needs to be sorted out pretty early apparently.
(Please be aware that there will be some pretty gross pictures of hoof disections in this post - please try to check them out though, the knowledge gained is invaluable!)
An x-ray of a normal hoof. 'A' indicates P3. (B is the navicular bone, c is P2 or the short pastern bone, and D is P1 or the long pastern bone).
A cross section of a cadaver leg.
This is an awesome digital image of P3 in relation to the lateral cartilages (light blue) and tendons.
Pedal Bone, Coffin Bone, P3, Distal Phalanx - this bone goes by a few different names. I like to refer to it as P3 as it is quicker to type and say!
P3 is the primary bone in the horse's hoof. To me, it looks like a little miniature version of a hoof - the outer hoof should match the bone on the inside. A bigger, flatter-soled P3 will show a flatter soled larger hoof. A very concave P3 bone will show as a hoof with magnificent concavity. There are soft tissues and blood vessels attached to P3 including the soft laminae that attach the bone to the hoof capsule.
Hoof with capsule removed showing the solar corium (the blood filled pad separating the sole and lower surface of P3), the soft laminae and the coronary corium from where the hoof horn grows.
Look at the solar surface! The sole and frog corium (which is just a fancy name for soft tissues if you ask me) looks like a play-doh cast of the hoof! This shows why it is important to have sufficient sole depth.
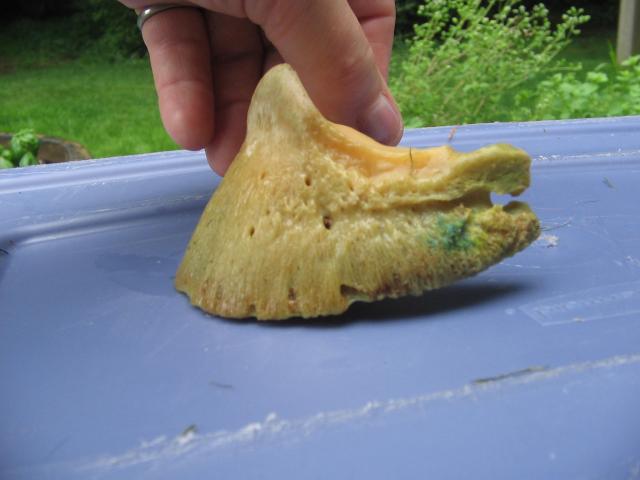
I did some googling and there are some VERY interesting pictures of P3 bones out there!
Various P3 bones of front feet from the top. The one top left has significant damage probably from an abscess or infection of some kind.
Same bones as the picture above but viewed as if holding the hoof in your hand to be picked. Note the different soles and how they differ in concavity.
As viewed from the side.
Here is P3 in the hoof capsule
And again on a shod hoof. Here it shows really well the concept that the collateral grooves (the valleys beside the frog) are a good indicator of sole depth - the shallower they are, the less sole you have.
You will hear about P3 being talked about in relation to rotation and balance, particularly with cases of laminitis.
Anterior to posterior balance refers to the angle of P3 in relation to the ground surface. The accepted norm is 3-5 degrees rotation when viewed from the side. This is to allow some movement of P3 and the structures in the back half of the foot to 'sink' when the hoof is loaded and expands (that is why it is important to trim in quarter scoops to follow the live sole plane).
The red lines show the amount of rotation - imagine this hoof being loaded when taking a step - the angle made by the two red lines would close when loaded to absorb impact.
Laminitis is as we all know when the laminitic structures loose their connection for a plethora of reasons and P3 can and often does rotate.
Here you can see the tip of P3 making the sole bulge just in front of the frog. Your brain should be screaming a warning at you if you ever pick up a hoof and see this! This is why a laminitic horse uses the infamous 'laminitis' stance - where a horse throws his hooves out in front of him and loads his heels to take the pressure off P3 and the excruciatingly painful laminae)
An x-ray of a laminitic foot. See how P3 has rotated, the hoof wall has ripped away from the front surface of P3? See how the foot would bulge?
The best way to see without an x-ray machine if the horse has an ideal or acceptable amount of rotation is to draw a line straight through the pastern and hoof - the angle of the hoof capsule should closely match that of the pastern.
Here is Gracie back in March this year - you can see the angle of the pastern vs the hoof is broken forward - the tip of P3 is is rotated slightly forward and down, which is evident in the flare on this hoof (most of which I removed).
Here is Allie in April. The angle is broken slightly backwards - her P3 would be more ground parallel than Gracie's. Both are functioning, sound feet.


